Table of Contents
Introduction

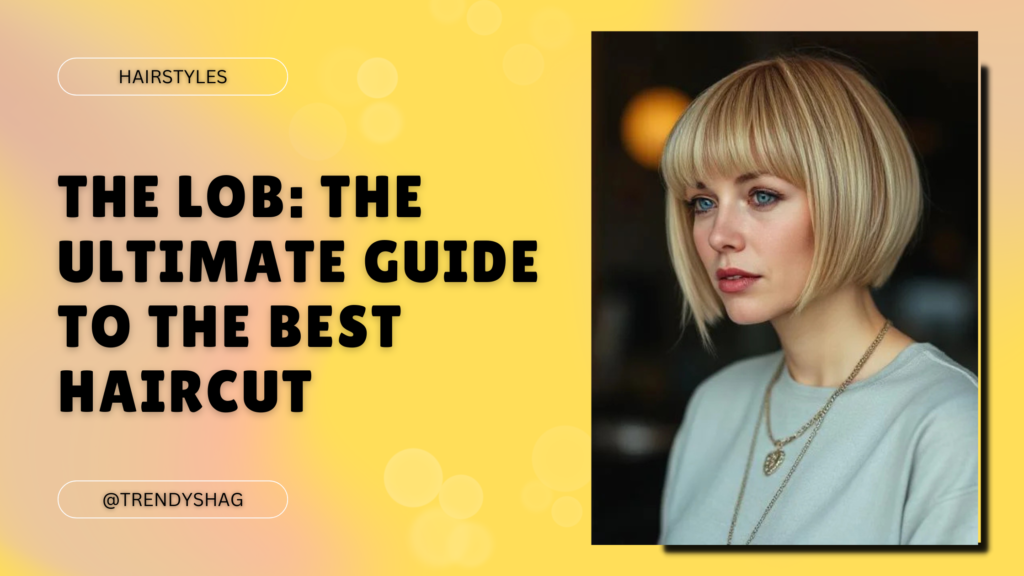
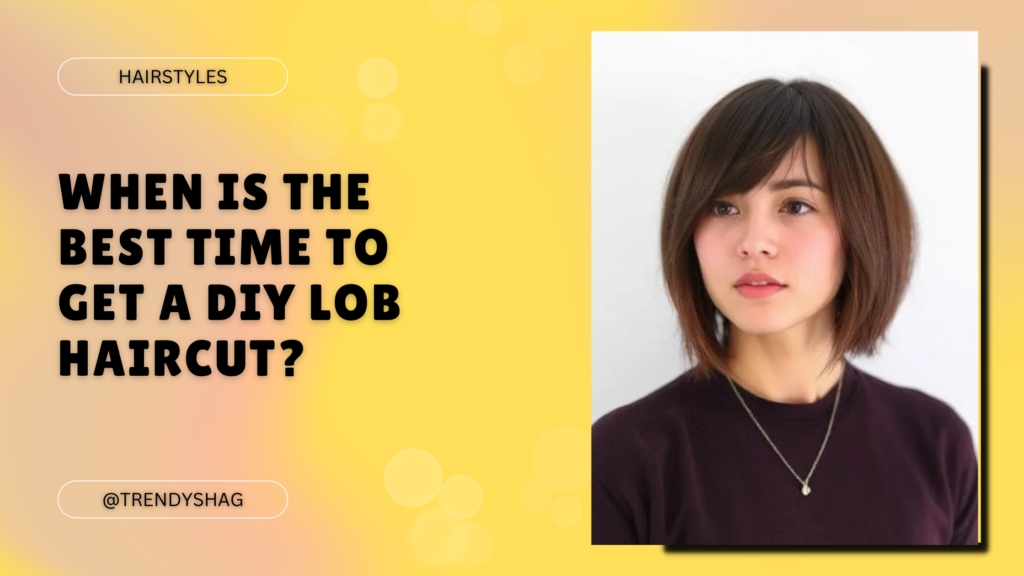
Ready to chop off that long hair and try a fresh new style with your DIY lob haircut? The lob, or long bob, is an immortal classic, able to uplift every face shape and hair type. A Lob haircut is something that many people prefer going to a professional stylist for but still, people prefer doing it themselves since it is easy. But there are, nonetheless, several things that one should remember before pulling out the scissors. As a result, when to get a DIY lob haircut?
In this blog, we consider the best time to cut your lob, tips to successfully do it yourself, and a few things to consider for that perfect result.
Why Choose a DIY Lob Haircut?
Before looking at the best time for cutting your lob, let’s briefly look at why one would choose to do it themselves instead of going to a salon.
- Cost-Effective: Salons can be expensive, especially if you know you’ll be needing trims very often. It’s much more economical to cut your hair than to have to make that stop now and then and pay for it.
- Convenience: You can get the lob yourself within the comfort of your home and at a more preferred time, considering there are no appointments required and no drive to the saloon.
- It shows through this control how much you want to cut and get the style yourself by doing it.
Now, understanding when DIY lob works: dive deep when it’s about time to go with this plunge.
When You’re Confident in Your Skills?
First, one should consider confidence in choosing the best time for a DIY lob haircut. It might get a little intimidating to cut your hair, especially for the first time. When you are comfortable using hair-cutting tools, can follow a tutorial, and your hand does not shake, then go ahead and have a try.
If you are not so sure about it, then it would be better to practice this on an old wig or at least on scrap hair rather than on your own. Doing a little research and tutorial videos would help you muster enough guts to make the first cut.
Pro Tip:
Just nick a little to start, and see how you go. You can always cut off more but once you take too much off that is it!
When You Have the Right Tools?
The second determining factor is when to do a DIY lob, and that is when you have the right tool for the job. It is your time when at your fingertips you have all the appropriate tools, including the following:
- Sharp Hair Cutting Scissors: Failure to use sharp scissors will lead to the arrival of split ends and uneven hair cuts. That is why, the scissors for professional hair cutting will be suitable, and they must be sharp and washed.
- Hair clips keep your hair combed into place and ensure equal cuts, with no stray or loose hair on your face.
- The fine-tooth comb will be helpful in sectioning where precision is a needed-for example when you are working up to an even cut for a symmetric one.
- First and second, the setup should include a dual mirror setup on your back and your front; it is highly critical because of how even your side lob will largely rest in the balance.
It is easier and far more effective when you have the right equipment for a DIY haircut. If you don’t yet have the right tools, then it is best you wait until you do so that you do not cut with poor tools and come up with an uneven or unsatisfying result.
When You’ve Reached a Comfortable Length?
The best time to do a DIY lob is when your hair has grown long enough that you can do something with it, but it’s reached that point where you no longer want it that long. Most lobs fall between the chin and collarbone, so aiming for that cut means it should at least reach your shoulders.
The DIY lob is perfect when one’s hair is already long and ready for some change. However, if it is just a couple of inches beyond your shoulders, and you are not sure about cutting too much off, then it is best to wait until you’re ready for an even bigger chop. Otherwise, it’s a risk you don’t want to take out if you’re not emotionally prepared to deal with such a huge difference.
Pro Tip:
This is because one should not get a curly or wavy hair type cut while being wet, since they usually shrink after getting dry due to which the lengths would come out uneven.
When You Have the Time and Patience?
Cutting your hair requires time and patience. A DIY lob haircut can take longer than expected, especially if it’s your first time. It’s important to set aside plenty of time to carefully measure, cut, and style your hair.
The best time for a DIY lob would be when one has a few hours to oneself without interference. It is not something that you rush; you need to take your time and make sure that the cut is even and just right. If you feel hurried or stressed then it will probably be more effective if you do it when you have time and are focused on what you are doing.
When You’re Ready for a Fresh Look?
A lob haircut is one of the best ways to update your appearance, and it cannot be easier when you do it yourself especially if your hair has been growing out for some time now or If you’re just bored with the long hair. For such hair that feels dead, too long, unmanageable, or all three, the lob may well be the solution for a new look.
But not impulsively. If you are emotionally down or want to change drastically, whether stressed out lately or because of a certain life situation that just happened, then it would be much better to wait for a few days before revisiting your decision. That is because one must always change styles when confident and sure about his decision.
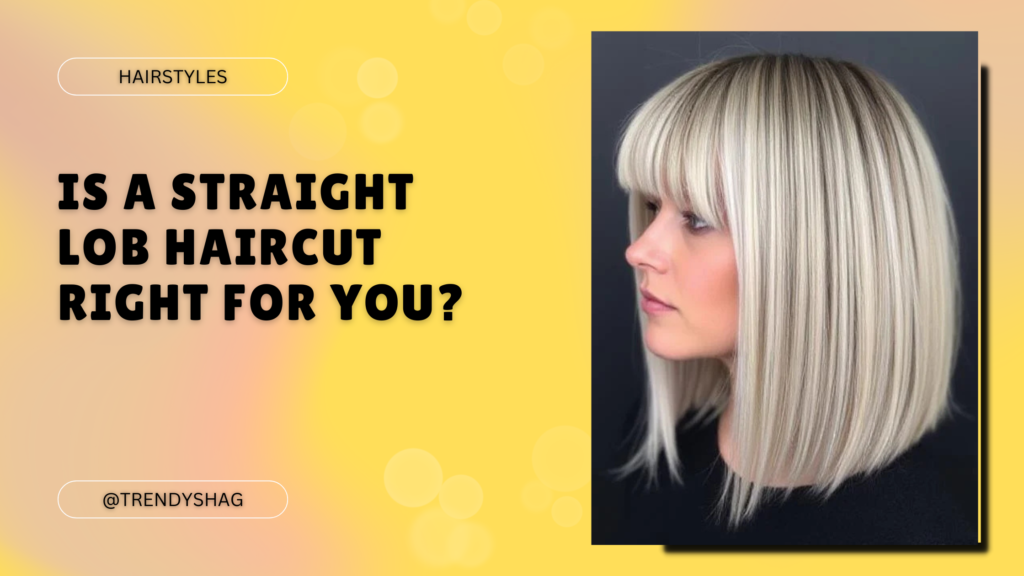
Check Out: Is a Straight Lob Haircut Right for You?
Tips for a Successful DIY Lob Haircut

Well, once you decide that now is as good a time as ever for a DIY lob haircut, then prepare for some fun, but rather quite a rewarding challenge in many ways. Of course, it could be a little intimidating to one degree or another, but an empowering cut of one’s hair was a means for me to get a fresh new look at home on minimal monetary funds. Equipped with just a few key tips, you will come out perfectly with your very own DIY lob haircut without the need to visit a professional.
Here is how: Key Tips for Successful DIY Lob Haircut The following are important tips to help in the quest for an effective DIY lob haircut that can be done even without any dangers and still confidently.
Cut Your Hair Dry
First and most importantly, cut your hair when it is dry when making a lob haircut by yourself. There is definitely a thought of just going and cutting them while they are wet, but remember that wet hair is going to be completely different in the way it moves when compared with dry hair. The wet strands become longer and when getting dry, shrink, sometimes altering their texture, hence moving. Which, not being watchful enough, could be different.
Dry cutting gives an even better view of how the lob is going to look once styled. You see the natural shape, and the way your hair falls, which in turn makes the cuts much more accurate without surprises. That means for those with curly or wavy hair, dry cutting is just an assurance that you won’t end up with a too-short cut after the curls have dried and spring back upwards.
Tip:
Make sure your hair is clean and dry before commencing the cut. If there is frizzy unruly hair, then a leave-in conditioner or light styling gel can be used to work with the smooth and manageable strands.
Trim Little by Little
The biggest mistake anyone trying to cut a do-it-yourself haircut would make is that one may tend to cut more at once. When doing so, it calls for just a little at a time, mostly if this is your first lob. You want to start with little, conservative trims for more control in terms of the length and allow adjustment where needed.
This is because taking too much hair at one time causes mistakes, and when it’s gone, it’s gone you can’t get it back. With a lob, you will always want to start longer rather than too short, working your way up; this will help your chances of not taking off one side too short and having to match the rest of your head to it.
Tip:
Cut and then take your time to step back between cuts to review your progress. That way, you can avoid over-cutting, keeping you keenly aware of the overall length. Always be conservative; too little is better than too much!
Use the Twist and Cut Method
Twist-and-cut might work out to be one of the better options for an even, layered finish, helping you achieve, in the course, a lob that looks and feels so much more natural, and symmetric, with no hacked edges that the straight-across cut probably presented you with.
How to twist and cut:
- Twist and cut: Divide your hair into sections- manageable-sized sections; then twist each of those sections, using your finger.
- Holding these sections twisted, cut across the twisted hair at the length desired. This creates soft, subtle layers, adding texture and movement to your lob without giving an effect of a sharp and choppiness to it.
Twisting is a little more layered and forgiving, as the ends naturally fall into a more rounded shape to avoid unevenness of your twists. This is ideal for people with slightly wavy or curly hair, as it will avoid line-y sections that don’t work when put against your natural wave or curl pattern.
Tip:
Be sure to twist the hair slightly so as not to cut too much off the ends. Because the twisted sections will appear shorter than they are, it is better to start at a longer length and then refine the cut more and more.
Conclusion
The time to get a DIY lob haircut would depend on many other factors coming into play, like the level of confidence, availability of the right tool, the present length of hair, and most importantly, the available time. Well, the best time would be when one feels ready, prepared, and has some extra time to take due care with every snip. Doing your lob yourself, if approached rightly, can be an entertaining job; it can get you a fresh and decent look.
If you are still in two minds about cutting your hair yourself, bear in mind that the help of a professional is never far away, but when the time is ripe, don’t let it go. Just remember that patience, preparation, and steady hand are key!
For More Info: Click Here!
FAQ’s
Can I cut my hair into a lob without professional help?
Well, yes, with proper preparation and equipment. Techniques implicated when giving a DIY lob are: cutting little by little, cutting dry, and using even twist-and-cut techniques. Well, everything is just dependent on doing it slowly, checking your moves in front of the mirror time by time, and being already prepared: sharp scissors, hair clips, and a good arrangement of mirrors. In this case, starting slightly longer is the easier alternative to going further and more extreme by stepping forward.
How do I make sure my DIY lob is even?
To ensure your DIY lob is even, follow these tips:
- Cut hair dry; wet hair tends to shrink once it dries and will end up being at an uneven length. Go little by little cut a little and then adjust for length as you go.
- Continuously check length using a double mirror setup for viewing the back of the head and then check often so that the sides are even.
- Cut in sections, using the twist-and-cut method.
- This twisting method can let your hair be cut section-wise in a twisted manner to make it more natural and even finish.
How do I fix a mistake if my DIY lob is uneven?
Step back and then trim off too-long parts but only in small bits at a time.
- Create soft layers around them. If you feel the mistake was big, gently blur the edges by giving them layers.
- You may be able to achieve it with a twist-and-cut technique or lightly snipping just enough to give a little texture to the hair to merge it.
- Professional help: Yeah, if it is pretty bad you may want to go back to a stylist and have them just quickly trim it, just to even the cutout.